Wednesday, May 30, 2012

"Made in the USA" First Impression Review: Ontario Blackbird SK-5 Wilderness Survival Knife


Ontario Knife Company was kind enough to send us their Paul Scheiter-designed Blackbird SK-5 "Hedgehog" Wilderness Survival Knife to test and review for our upcoming "Made in the USA" Wilderness Gear article. I thought I would post a quick "First Impression" review ahead of the main review so that readers can get an idea of the looks, dimensions and sheath.

The SPECS:
  • Steel: 154CM Stainless Steel
  • Blade Length: 5"
  • Overall length: 10"
  • Blade thickness: 0.13" (3.3mm)
  • Rockwell hardness: 58-60 RC
  • Micarta Handle
  • MOLLE Compatible Sheath
  • Knife Weight: 8.4 oz.
  • Sheath Weight: 3.5 oz.
  • Paul Scheiter Design
  • Made in USA

The Blackbird SK-5 ("SK-5" stands for "Survival Knife, 5" Long Blade) came packaged inside a plain cardboard box.


My first impression after pulling it out of the box was that the Blackbird looked more attractive than most of the stock photos I've seen on the internet. The sheath's earth-toned "Coyote Brown" color coupled with the gray canvas Micarta handle offers a pleasing contrast, with a look that says "serious wilderness knife."

 (click to enlarge)

The Blackbird features a 154CM Stainless 5" long blade with a full flat ground/spear-point design and a small bevel at the edge. The Micarta handle is secured to the tang of the knife with three stainless steel Allen screws. One feature I particularly like is the wide lanyard hole in the handle. It should make lashing the knife to a pole for use as an improvised machete or spear easier.

(click to enlarge)

The Blackbird has a full tang and the blade is just over an 1/8 of inch thick:

(click to enlarge)

Sheath

The sheath is a MOLLE compatible cordura nylon sheath with a felt-lined plastic insert in it to hold the blade. The knife is held in place by a single retention strap with a heavy button snap.

(click to enlarge)


Comparison Shots

The Blackbird next to the 4.25" Mora Bushcraft Force

(click to enlarge)


Next to the Gerber Bear Grylls Ultimate Knife (review will be posted soon!)

(click to enlarge)

UPDATE- Check out our full Field Review of the Blackbird

First Impression Summary

The Ontario Blackbird looks to be a very promising medium-sized bushcraft/wilderness survival blade. It is comfortable in the hand, and the blade is a simple, no-nonsense design that's built for function over style, something I find appealling. The back of the blade is sharp enough to spark a firesteel, or to scrape magnesium or natural tinders for fire-making.

The back of the blade is also ground flat all the way to the tip, making it well-suited to batoning. The sheath is attractive and functional, though I was hoping it would come with a pouch to hold a sharpening stone, firesteel, etc. Rumor has it that Ontario is working on a new sheath, so I'll be interested to see if the new version has a pouch when it's released.

The knife came shaving-sharp right out of the box, something I've seen with most Ontario knives when they're new. It's nice to see this trend continue with the Blackbird as well. 

Overall, this looks to be a great all around bush knife. The 154CM stainless should hold an edge well, and the full flat grind should lend itself nicely to wood carving, food prep and batoning. Dave and I plan to give a pair of SK-5 Blackbirds a good thrashing over the next two months in the mountains, and we'll report our findings in an indepth review sometime in July/August.

Monday, May 28, 2012

Tips & Tricks: Use Mineral Oil or Petroleum Jelly to lubricate your Carbon Steel Knives and Axes


A cheap way to keep carbon steel knives and axes lubricated and rust-free is to use common store-bought Mineral Oil or Petroleum Jelly. Mineral Oil is particularly suited to knives because it is safe to ingest while also being odor-free and taste-free.

For axes, try Petroleum Jelly. It has a thicker consistency and sticks to the metal axe head better. Axes generally aren't used for food prep, so taste and edibility are not an issue, making petroleum jelly the better choice. Be sure to wipe off any excess jelly before putting your axe inside your pack, or else a lot of your other gear will get lubricated too!

Mineral Oil and Petroleum Jelly can also be used in other ways for bushcrafting. Petroleum Jelly combined with cotton balls makes a great tinder that's easily ignited with the spark of a firesteel, and Mineral Oil can be used to lubricate moving parts on liquid gas backpacking stoves like the MSR Whisperlite, XGK, etc.

Editor's note:  I'm a city girl compared to Jason and Dave and I had never heard of using Petroleum Jelly to start a fire until I edited this article.  Over Memorial Day I had some friends over and we decided to have a bonfire.  I brought out the cotton balls, Petroleum Jelly, and my Mora Fire-Knife.   My friends were skeptical, but humored me.  With just one spark from the Mora the cotton ball caught fire and we had our bonfire!  I was impressed with how well this worked and my friends were amazed at my new knowledge...now I'll be the one to start our bonfires! -Leah

About the author
Jason Schwartz is the founder and senior editor of Rocky Mountain Bushcraft. He is a former Red Cross certified Wilderness & Remote First Aid Instructor, and has taught bushcraft and wilderness survival techniques to the Boy Scouts of America, interned with the US Forest Service, and studied wilderness survival, forestry and wildland firefighting at Colorado Mountain College in Leadville, Colorado. Jason has also written for magazines such as The New Pioneer and Backpacker, including writing the "Tinder Finder" portion of Backpacker's "Complete Guide to Fire," which won a 2015 National Magazine Award (NMA). Email him at rockymountainbushcraft @ hotmail.com (without spaces)

Monday, May 21, 2012

Tips & Tricks: Cotton Bandana- The Original Multi-Tool!


The plain cotton bandana is often forgotten as a simple, yet essential, piece of gear in wilderness packs. The vast array of tasks it can perform is only limited by your imagination. Below is a list of some of the things it can be used for:

  • Handkerchief (if you get stuck out in cold weather your nose will run like a faucet!)
  • General purpose rag
  • Hand Towel
  • Emergency toilet paper
  • Neck or Face scarf
  • Tourniquet
  • Bandage/Ace Bandage
  • Patching material for torn clothing or backpacks
  • Strainer for silty water
  • Protection while grabbing hot pot handles
  • Dish rag
  • Bandana (who'd a thunk it?!!)

A typical cotton bandana only weighs an ounce, so for a small amount of weight, you get a lot of function. If you need to clean and re-use it, just rinse it in a stream, lake or river. To sterilize it or to remove grease, boil it in water for a couple of minutes and you're ready to go.

Also, carry your bandana in a zip lock bag or other waterproof container to keep it dry until needed.


About the author
Jason Schwartz is the founder and senior editor of Rocky Mountain Bushcraft. He is a former Red Cross certified Wilderness & Remote First Aid Instructor, and has taught bushcraft and wilderness survival techniques to the Boy Scouts of America, interned with the US Forest Service, and studied wilderness survival, forestry and wildland firefighting at Colorado Mountain College in Leadville, Colorado. Jason has also written for magazines such as The New Pioneer and Backpacker, including writing the "Tinder Finder" portion of Backpacker's "Complete Guide to Fire," which won a 2015 National Magazine Award (NMA). Email him at rockymountainbushcraft @ hotmail.com (without spaces)

Thursday, May 17, 2012

BEAR SAFETY: How to Camp in Bear Country

(This is excellent article and photos are courtesy of Lynn L. Rogers, PhD of the Wildlife Research Institute.)

Introduction

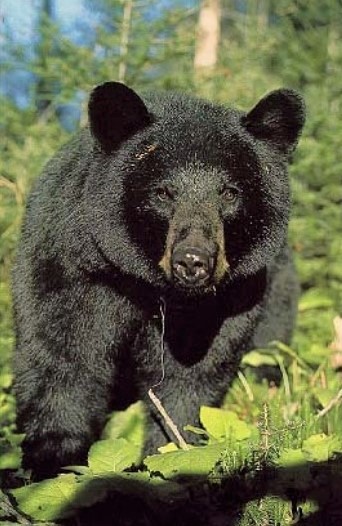
Seeing a black bear can be one of the most memorable experiences of a wilderness vacation. Bears seem almost human at times, partly because of their high intelligence and partly because they can stand and sit like we do. Their diet is also somewhat like ours, so fruit and nut shortages are problems for them just as they were for primitive people. In years of crop failure, black bears are almost as quick as chipmunks to overcome their fear of people and seek out food. And they are extremely adept at getting it. They have color vision, acute hearing, and a keen sense of smell. They learn quickly and can remember feeding locations for years. They can climb trees, bend open car doors, and pry out windshields. They readily swim to island campsites. They adapt their lifestyles to the availability of food, often becoming nocturnal to avoid confrontations with us rather than sleeping at night like they usually do.

How to Protect Your Food and Property

The best way to prevent food pilfering in bear country is to avoid the bears. That means by-passing campsites with bear tracks, fecal droppings, and scattered garbage. Bears are regular visitors there. But if you must camp at such sites, keep a clean camp. The less food odor in your camp the less chance the bears will linger when they make their rounds. Wash dishes immediately and dump the water away from the camp. Completely burn any edible garbage, including grease, rather than burying it or throwing it in a latrine.

Most black bears will not enter a tent with people in it, but it is still a good idea to keep food and food odors out of tents and sleeping bags. To be on the safe side, wash food from your face and hands before going to bed and hang clothing beyond reach of bears if it has food or cooking grease on it. Perfume may mask human odor, preventing bears from knowing a person is in the tent.

Bearproof food lockers and portable bearproof containers provide the best protection for your food and are far superior to any alternative. An outfitter who outfits hundreds of groups each year switched from canvas food packs to portable bearproof containers three years ago and says he has not lost any food to bears since. Bearproof food containers are lightweight and their price is competitive with canvas packs.

The next best thing to a bearproof food container is to store food in the trunk of your automobile or in sealed plastic bags suspended from a line between two trees. Some campsites have lines or horizontal poles 20 feet above the ground. Sling the food bags over the line or pole so they hang 5 feet below it, at least 10 feet from the nearest tree trunk, and at least 12 feet above the ground.  


Bears have been known to leap from tree trunks to snatch food bags, and large black bears can reach up nearly 9 feet without jumping. Slinging the bag over a branch is less effective because bears can break small branches and climb out on large ones. If a branch must be used, sling the bag far out on the tip of a branch larger than 4 inches in base diameter. Bears sometimes chew through ropes to get hanging food bags, so it is best to counterbalance the bag with a second one to avoid tying the rope where a bear can bite it. To retrieve counterbalanced bags, use a long stick to push one bag up so the other will descend to within reach.

Most campers do not see a bear, especially in years when natural food is abundant. But when natural crops fail, bears recognize some human foods as worth trying. Where bears are camp-wise, hanging food might be only a delaying tactic to give you time to personally protect it. Pans hung on the food bag can alert you. Nonburnable garbage should also be hung and should be packed out when you leave.

Bears learn that coolers, backpacks, food bags, and other containers might contain food. Keeping empty containers out of sight (in a car trunk or away from camp) or leaving them open so bears can see that they are empty will reduce property damage. If the containers smell of food, hang them with the plastic food bags to prevent bears from carrying them off. Food odors in empty containers are minimized if the food was packed in plastic bags that can be taken out of the containers and hung. When leaving camp, tie tent flaps open so bears can easily check inside.

What to Do If a Black Bear Visits

A black bear in camp requires caution but is not cause for great alarm. Most are timid enough to be scared away by yelling, waving, and banging pans. But a few are too accustomed to people to be bothered. Many people have lost their food and vacation by being timid. Campers experienced with black bears simply chase them away before the bears settle in to eating a week's supply of vacation food. They make sure the bear has a clear escape route and then yell, wave, and rush to no nearer than 15 feet of the bear. This is especially effective when several people do it together. If alone, a person might create the illusion of numbers by throwing sticks through the underbrush. Don't feed the bears or try to pet them. Touching a wild bear can elicit a nip or cuff.

Black bear mothers may bluff-charge, but they rarely attack people.

A recent study by the National Park Service showed that bears sometimes are harder to chase after they have begun eating. Some bears in that study gave low intensity threats when people slowly approached closer than 15 feet, but all bears that were chased retreated. No visitors were attacked. People are often more timid at night, but bears retreat at night as well as by day. Capsaicin spray repellent (bear spray) usually persuades black bears to leave when it is sprayed into their eyes. Capsaicin, the active ingredient of cayenne peppers, has long been used by mailmen as a dog repellent. In more than 200 trials, no bear gave any sign of anger after being sprayed, sometimes repeatedly. Most immediately turned and ran, stopping eventually to rub their eyes. The repellent irritates the eyes for several minutes but causes no injury.

How Dangerous are Black Bears?

Black bears can injure or kill people, but they rarely do. When pressed, they usually retreat, even with cubs. Attacking to defend cubs is more a grizzly bear trait. (Grizzlies live only in Alaska, northern and western Canada, and the Rocky Mountains south to Yellowstone.) Black bear mothers often leave their cubs and flee from people, and those that remain are more likely to bluff-charge than attack. It is prudent to use caution when close to any bear, but chances of being attacked around campsites by any black bear are small.  During a 19-year study of bear/camper encounters in the Boundary Waters Canoe Area Wilderness in Minnesota, only two injuries were reported in 19 million visitor-days. The study included the year 1985 when bear nuisance activity was at a record high. The two injuries were by one bear on September 14 and 15, 1987, and the bear was killed the next day.

Both black bears and grizzlies can be brown, but no grizzlies live east of the Rocky Mountains

Unprovoked, predatory attacks by black bears are highly publicized but rare. Such attacks have accounted for all 48 deaths by non-captive black bears across North America this century. Most occurred in Canada and Alaska where the bears had little previous contact with people, rather than in and around established campsites. Predatory attacks by black bears are usually without bluster or warning. People involved in such attacks can improve their chances by fighting and using pepper spray. Deaths from such attacks average a little less than one every two years across the United States and Canada.

A sign of curiosity, not anger, standing helps bears see and smell.

By comparison, a person is about a hundred times more likely to be killed by a bee than by a black bear and a hundred thousand times more likely to die in a traffic accident. Each year there are many thousands of encounters between black bears and people, often unknown to the people because the bears slip away so quietly. A misconception is that menstrual odors are attractive to black bears. Actually, there is no record of any menstruating woman ever having been attacked by a black bear, and studies have shown no attraction by black bears to such odors. 

Dozens of minor injuries, some requiring stitches, have occurred across North America when people petted or crowded black bears they were feeding or photographing. Under those circumstances, black bears may react to people as they do to bears with bad manners, by nipping or cuffing with little or no warning. Also, people who tease bears with food have been accidentally injured when the bear quickly tried to take it. Fortunately, black bears usually use at least as much restraint with people as they do with each other. Unlike domestic dogs, which often are territorial and aggressive toward strangers, wild black bears are basically timid.

Most injuries from black bears are minor and result from feeding, crowding, or petting.

Black bears that want our food sometimes bluff in ways that appear threatening, as has been reported by campers, picnickers, and backpackers. Hungry bears that approach people for food often lack the confidence to approach calmly, and they express their nervousness and fear by lunging and slapping the ground or a tree, blowing and clacking their teeth, and exhibiting other blustery behavior. Black bear lives are ruled in large part by food and fear, and they have several ways of expressing different levels of fear.  Blustery sounds and actions are done explosively and appear ferocious, but I have never seen or heard of a blustery bear coming after anyone and hurting them. All blustery bears that I have seen ran away when pursued.

Black bears have a resonant, human-like "voice" that they use to express a range of emotions such as fear, pain, pleasure, and anger. In over three decades of close-up research, I have never heard a black bear growl, although most bear stories I have heard include mention of a growl. A common sound that campers hear is the low, throaty moan of fear that bears commonly voice when they are treated. 

Encounters with bears are remembered and retold for years to come. Most campers in black bear country never see a bear. Seeing one is proof that we still have extensive enough forests for this wide-ranging animal. Keeping a clean camp helps to insulate bears from the effects of our increasing use of the wilderness for recreation and helps prevent bears from being needlessly relocated or killed as nuisances.

Editor's Note: Rocky Mountain Bushcraft highly recommends the following consumer products for safe travel in bear country:

BEAR SPRAY: Counter Assault Bear Spray (same spray carried by US Wildlife Protection officials and by members of Rocky Mountain Bushcraft while gear testing in Black Bear and Grizzly country- it's the best in our opinion!). MADE IN THE USA

TRADITIONAL BEAR CANISTER:  BearVault Bear Canisters. These canisters are time tested and well respected in the outdoors community. MADE IN THE USA

ULTRA-LIGHT BEAR CANISTER: Ursack Kevlar Bear Protection SackInteragency Grizzly Bear Committee (IGBC) certified ultra-light Kevlar bear protection canisters. MADE IN THE USA

VEHICLE\CAMP\BOAT FOOD STORAGE CONTAINER: Pelican ProGear Elite CoolersLockable ice coolers in various sizes that are Interagency Grizzly Bear Committee (IGBC) certified. Check out Pelican's grizzly bear test on one of their coolers! Great disaster preparedness item too-- in RMB's independent tests, a 45 Quart Pelican Elite Cooler held ice for nearly 8 days in hot weather. MADE IN THE USA

ODOR BARRIER FOOD BAGS: OPSAK odor-barrier bags. Built to US military specifications and highly respected among soldiers and serious outdoor adventurers, OPSAK bags are a great way to minimize a bear smelling your food when trekking in the backcountry. MADE IN THE USA

Tuesday, May 15, 2012

Gear Review: Equinox Egret Tarp


Equinox has been employing American workers to make a wide range of tarps, raingear and backpacks in its Williamsport, Pennsylvania manufacturing facility for over 20 years. In addition, they've developed a great reputation amongst the ultra-lite backpacking community for their quality gear. In this review, we'll be taking a look at their affordable line of tarps-- the Equinox Egret.

The SPECS:

  • Weight- (8' X 10' model tested for this review)- 24.2 ounces (as weighed on a digital postal scale)
  • Grommets- 5 per side
  • Constructed from 1.9oz ripstop nylon with a waterproof, urethane coating
  • All key seams are double stitched
  • Sizes- 5' X 7', 6' X 8', 8' X 10', 10' X 12', 12' X 16'
  • Country of Origin- Made in Williamsport, Pennsylvania USA

Features

The 8' X 10' Egret Tarp we tested for this review came with a total of 20 reinforced brass grommets. They are large enough to drive self-made wooden tent stakes through, an important feature for bushcrafters.


The material is made out of 1.9 ounce rip-stop nylon on the outside and treated with a waterproof urethane coating on the inside.

(click to enlarge)

The  8' X 10' Egret provides plenty of room to sleep two people, or one person with their gear protected under the tarp. The gear shown inside the tarp is also made in the USA and includes a Grabber Space Tarp, Therm-a-Rest Z-Lite pad, and ProLite Plus self-inflating mattress.

(click to enlarge)

Field Testing the Egret

We chose to review the 8' X 10" Egret because it offers a good balance between light carry weight and adequate protection from the elements. This size is great because it is large enough to build an improvised teepee or use as an open-ended tent. 

Large, improvised teepee Dave and I created on a weekend backpack trip to the mountains, with most of the coverage provided by the Egret tarp:

At 24.2 ounces, it's definitely no ultra-lite tarp. However, it's extra weight gives it an advantage in durability and the ability to resist flapping around on windy nights. It also held strong in the face of an overnight snow storm as shown below:


 Conclusion

Throughout many days of field testing the Egret, we encountered a lot of snow, rain and sleet but never had problems with leakage. We were both impressed with the Egret's durability, because even though Dave and I were rough on it, it still came out looking like new.

The Egret costs the same as most foreign-made tarps, so I can see no reason why you shouldn't give this quality American-made tarp a try over foreign made tarps the next time you're in the market to buy one.


About the author
Jason Schwartz is the founder and senior editor of Rocky Mountain Bushcraft. He is a former Red Cross certified Wilderness & Remote First Aid Instructor, and has taught bushcraft and wilderness survival techniques to the Boy Scouts of America, interned with the US Forest Service, and studied wilderness survival, forestry and wildland firefighting at Colorado Mountain College in Leadville, Colorado. Jason has also written for magazines such as The New Pioneer and Backpacker, including writing the "Tinder Finder" portion of Backpacker's "Complete Guide to Fire," which won a 2015 National Magazine Award (NMA). Email him at rockymountainbushcraft @ hotmail.com (without spaces)

Saturday, May 12, 2012

How to Build a Primitive Bow Saw in the Wilderness


I'll be the first to admit that a good, sharp axe is my favorite bush tool. It can do almost anything you need, whether it be chopping down a dead tree for firewood, bucking and splitting logs, or even creating feather sticks. The problem is, an axe is just plain heavy.

I pack an axe whenever possible, but reality can be a cruel mistress when hiking through the wilderness. That extra 3 pounds of forged carbon steel and hickory can feel like 50 pounds when added to a backpack already loaded to capacity with food, water and other multi-day backpacking essentials.

So what do you do if you're into using serious wood processing yet can't bear the weight of an axe? -- Improvise! By packing just a 2 ounce bow saw blade and a 3.5 ounce Mora fixed blade knife, you can literally saw 10-12 inch thick trees in half which then can be used for firemaking, shelter construction, etc. Yes, it sounds hard to believe, but I'll show you how to do it and it's actually quite simple.

A dead Aspen tree sawed cleanly in half with a primitive bow saw made from a Spruce branch:

Before going any further, I would like to thank Ben's Backwoods for sponsoring this article, as they were gracious enough to send us a pair of Swedish Bahco bow saw blades to use. I have been buying axes and Mora knives from Ben's for years, and the service has always been excellent. Ben is a well respected member of the bushcraft community, and is also an expert on axes, saws and knives, so he's a great person to deal with if you have questions about the product you're buying. Please check out his internet store. He has a lot of cool stuff!

THE TOOLS YOU WILL NEED

  1. 24" Bow saw blade (please see my "Raker-Tooth vs Peg-Tooth blade" write-up below to decide which one you need)
  2. Some type of self-made sheath to safely hold the bow saw blade (can be made of cardboard and Duck Tape as shown in the article below).
  3. Two 1" diameter metal key rings (available at local hardware stores)
  4. Swedish Mora Fixed Blade Knife (almost any model will work)
  5. Multi-tool with a wood saw blade-- any multi-tool with a wood saw blade will work, but if you're counting ounces, I'd recommend something like a 2.6 ounce Victorinox Camper Swiss Army Knife or a Coghlan's Pocket Sierra Saw. (NOTE: In a survival situation, you can use just your knife to baton through a branch to make the bow saw)

Shown in the photo- Bahco Peg Tooth 24" Bow Saw blade, Mora FireKnife by Light My Fire and a Victorinox Camper Swiss Army Knife.
                                                                                        (click to enlarge)

DISCLAIMER! Do not try this technique without heavy leather work gloves and safety glasses. The teeth on a fresh bow saw blade are razor sharp and can cause serious injuries. ALWAYS carry a wilderness first aid kit. If you try this technique, try it at your own risk. Rocky Mountain Bushcraft is not liable for any injuries sustained. There is inherent risk in all wilderness survival techniques, so be extremely careful at all times!

Finding and selecting a bow stave to make the saw

Almost any green softwood branch can be used to make a bow saw, but softwood isn't very durable and might not hold enough tension on the saw blade for optimal use. When possible, always seek out the strongest and most flexible wood available. Here in the Central Rockies, we are rather hardwood-challenged so-to-speak, since most of the forests are covered with softwoods like Pine, Spruce, Fir and Aspen (Aspen is technically a Poplar which is considered a hardwood, but it is actually softer than many evergreens). 

As mentioned, these softer woods can certainly be used in a pinch, but if you can find hardwood like Rocky Mountain Maple, Serviceberry, Gambel Oak, Box Elder, Wild Locust, Mountain Mahogany, Water Birch, Choke Cherry, or Juniper (a softwood, but good for bows) your bow saw will last longer and be more effective at keeping tension on the blade. Willow is also a good option if you can find it.

For those of you outside of the Rockies, there are usually more options. Yew or Vine Maple works great if you're in the Northwest. Osage Orange found in the Mid-West is one of the best bow-woods in the world. Hickory, Ash, Oak, Elm and Maple are classic choices for those in the Northern Mid-West and Eastern parts of the country. Birch and Willow are also common in these areas and would work in a pinch.

If you're in California, no need for a bow saw as it never rains or gets cold there! Just kidding. The Oak and Juniper that's found in the mountains of California would make great bow-wood. Scrub Oak and Mesquite down in Texas and Arizona might also be useful for this technique. If you know of other good bow-woods please leave a comment below.

PHOTO: Dave standing in front of a large, scraggly Rocky Mountain Maple tree at about 9,000 ft elevation. Rocky Mountain Maple trees are technically considered shrubs, but their wood is actually a variety of Hard Rock Maple, so it's very strong and flexible. The leaves and seeds look almost identical to other Maple trees providing an easy way to identify them (if it's winter, look on the ground for dead leaves and seeds for positive identification).

(click to enlarge)

How to construct a primitive bow saw

If possible, try and find the best bow woods in your area to procure a proper stave to make your bow saw. In the photo above, this tree was not a suitable prospect because all the branches were extremely crooked.

However when we went around to the other side of this rock formation we found another Mountain Maple that had straighter branches that we could use to make our bow saw (see photos below). If all you can find is softwood, it will still work but it won't be as durable. (see the demonstration further down in the article where I cut an Aspen tree in half with a spruce bow saw).

IN THE PHOTO BELOW:  I sent Dave to do the dirty work of finding and sawing off the stave while I got to lounge around and take photos! Note the Mountain Maple growing around a mature Aspen tree:

(click to enlarge)


IN THE PHOTO BELOW: Dave is breaking out a Coghlan's Pocket Sierra Saw while inspecting the tree for a good stave to cut. For the purposes of demonstrating a potentially life-saving wilderness survival technique, we cleanly pruned one branch off of this Mountain Maple to make our bow saw. Please be a good steward to the land and only cut what you need. Always minimize the footprint you leave in the backcountry!

(click to enlarge)

Sawing off the stave (yes, that's a Bear Grylls Ultimate Fine Edge Survival Knife that we're testing for Gerber hanging on Dave's belt).

(click to enlarge)


Success!


Preparing the stave

In the photo below is the Mountain Maple branch we cut, along with the bow saw blade, and a crude cardboard and Duck tape sheath I made to safely hold everything while in my pack. 

Note the key rings linked together on one end of the bow saw blade. This makes it easier to safely grab the blade when pulling it in and out of the sheath, plus it keeps both rings attached securely. As you'll see, these key rings make constructing the bow saw faster and easier than using wooden pegs or a section of a branch to hold the bow together. Thanks to Ben Piersma of Ben's Backwoods for sharing the key ring tip with me!

(click to enlarge)

Since I mentioned making a crude cardboard sheath to hold the bow saw blade, I also wanted to mention a more expensive, but incredibly cool alternative for carrying your bow saw blade into the backcountry-- Bushcraft Northwest's Leather Survival Belt with a bow saw blade inside.


Bushcrafting legend Mors Kochanski is known to have made a custom leather belt to carry a bow saw blade with him, so Bushcraft Northwest owner Mike Lummio took Kochanski's idea and ran with it, creating a leather survival belt which holds a Bahco 24" Peg-Tooth bow saw blade inside. The screws on the belt are removable and are made to secure the ends of the blade into a primitive bow saw. If James Bond were a bushcrafter, he'd certainly be wearing one of these!


Now let's get back to building a primitive bow saw!

The next step is to delimb the branch. This is easily done with a Mora and Swiss Army saw as shown. Once the branch is delimbed, measure the length to be cut by placing the Mora alongside the bow saw blade and stave as shown below. Pretty much any standard Mora will work. I placed the Mora's handle to match with the second hole in the bow saw blade. If you don't have a Mora, you can always do it the old fashioned way by bending the stave to the desired curvature and marking it for the cut. If you do have a Mora, this just makes the procedure easier and faster.

(click to enlarge)

Now that stave is cut, find the natural bend in the wood. You will use this natural bend when "stringing" the bow saw, just like with a regular bow that shoots arrows. Once you find the natural bend, mark the ends of the stave to align with each other. These will be slots that the bow saw blade fits into. 

In these photos, I am not wearing gloves for demonstration purposes ONLY. Unless you are in a true survival situation, always wear leather work gloves and safety glasses when practicing this technique!

(click to enlarge)

Now that the stave is marked and ready, it's time to create the slots that will hold the bow saw blade by batoning your Mora knife into each end as shown. In an emergency, this can also be done with almost any pocket knife, locking or non-locking. The baton shown on the left is a dead Aspen branch sawed with the Swiss Army knife.

(click to enlarge)

Now that the stave is ready, attach the key rings at both ends of the saw blade as shown.

(click to enlarge)

Place the end of the saw blade into one of the slots. It's also a good idea to carve a shallow notch into each end of the stave to help anchor the key rings in place. It should look similar to this:


"Stringing" the Bow Saw 

Place the stave against your leg as shown in the photos below and gently bend it while also pulling on the key ring to set the blade in place. Once again, I'm using bare hands for demonstration purposes only-- always wear gloves and safety glasses when trying this technique! And in case you missed it earlier, use ONLY green wood to make bow saws. Otherwise, you might end up having a bow saw snap in half and a razor sharp bow saw blade flying towards you - not good! 

(click to enlarge)

Before I go into the field test to show you how well this saw can perform, a discussion about the two common bow saw blade styles is in order.

Raker Tooth blade vs Peg Tooth blade- which one to choose?

For this particular test, I used a 24" Bahco "Peg Tooth" bow saw blade. In the world of bow saw blades, there are two main blade designs-- the "Raker Tooth" and the "Peg Tooth." In the comparison shot below, the Peg Tooth is the blade with the smaller teeth shown above, and the Raker Tooth is shown below:

(click to enlarge)

The difference between the two is simple. The Raker Tooth is designed for cutting green wood, which is soft and moisture-laden and which quickly loads up the saw channel with debris. This can rapidly deteriorate the saw's effectiveness. The Raker Tooth is designed to "rake out" the excess debris, which maintains the efficiency of the saw, hence the name. I've also found Raker Tooth blades to be a better choice for sawing through highly resinous fatwood/pitchwood.

Peg Tooth blades, on the other hand, are designed for cutting dry wood. The performance advantage of Peg Tooth over Raker Tooth blades in dry wood is dramatic. In my independent tests, a Peg Tooth blade out-saws a Raker Tooth blade by roughly 50%. The downside is that Peg Tooth blades tend to gum up faster when cutting green wood.

Still, for a survival saw blade, I'd rather carry a Peg Tooth if I could only choose one, since cutting firewood to stay warm would be a top priority. The nice thing is that these blades only weigh 2 ounces a piece, so you can easily carry both styles to handle any wood cutting job that arises.

Field Test/Demonstration

To demonstrate the effectiveness of our primitive bow saw, we performed three tasks-- 1) sawed a dead branch off of a downed tree 2) sawed a dead Ponderosa Pine tree in half, and 3) sawed a dead Lodgepole Pine tree in half.
 
Test #1- I was able to saw this branch off 3-4 times faster than I could with my Bahco Laplander 7" folding saw:

(click to enlarge)

Dave sawing a dead Ponderosa Pine in half:

(click to enlarge)

Dave sawing a dead Lodgepole Pine tree in half (I had to fight with him to get the saw back because he was having way too much fun with it!)

(click to enlarge)

Primitive Bow Saw from a green Spruce branch

As mentioned earlier, you can use almost any green branch if necessary. To demonstrate this, I went on a separate mountain trip with my stepson and made a primitive bow saw with a green spruce branch. 

With this spruce branch version, I was able to saw a dead Aspen tree clean in half with it. This bow saw didn't last very long, but I could have sawed enough firewood to last for several hours before it broke. 

I also sawed off a dead Aspen branch to make a baton as well as a smaller log to make kindling as shown below.

(click to enlarge)

The baton would be used with the Mora to split the smaller log into kindling-size pieces in order to get a fire going. Once a smaller fire was going, the larger logs could be added to build an all night fire to stay warm.

(click to enlarge)
 
Conclusion

To make a long story (and article) short, if you want to bring lightweight yet heavy horsepower for wood processing/survival, just carry a two ounce bow saw blade along with a Mora knife. There is no other combination that can beat the amazing performance-to-weight-ratio that this highly capable pair offers.


About the author
Jason Schwartz is the founder and senior editor of Rocky Mountain Bushcraft. He is a former Red Cross certified Wilderness & Remote First Aid Instructor, and has taught bushcraft and wilderness survival techniques to the Boy Scouts of America, interned with the US Forest Service, and studied wilderness survival, forestry and wildland firefighting at Colorado Mountain College in Leadville, Colorado. Jason has also written for magazines such as The New Pioneer and Backpacker, including writing the "Tinder Finder" portion of Backpacker's "Complete Guide to Fire," which won a 2015 National Magazine Award (NMA). Email him at rockymountainbushcraft @ hotmail.com (without spaces)